
IN THE FOOTSTEPS OF THE ALLIED 21ST ARMY GROUP
D-Day, 6 June 1944: Part Five — The Allied Navy
by Lt Col (Retd) Ian R Gumm MSTJ TD VR BSc (Hons)
Throughout the build-up for the invasion, the Allied Navy was busy ensuring that the North Atlantic crossing and the waters of the English Channel were secure. Their operations included keeping the crossing between North America and Great Britain open, denying the use of the waters of the English Channel to the German Navy through aggressive patrolling, and clearing the mines from the coastline of England, its harbours, and the approach routes for the invasion.
By mid-1943 the Royal Navy [RN] had fought the Battle of the Atlantic and virtually cleared the U–boat menace that had disrupted the supply convoys from North America. Advances in technology, such as Radio Detection and Ranging systems [RADAR] and an early Anti-Submarine Detection system [ASDIC], had helped achieve this Herculean task, as had increasingly effective air patrols and the successful breaking of the ENIGMA SHARK code at Bletchley Park. If Great Britain was to be the base for a successful invasion of Northwest Europe this hard-won victory had to be consolidated to prevent the roving U-Boat Wolf packs from returning.
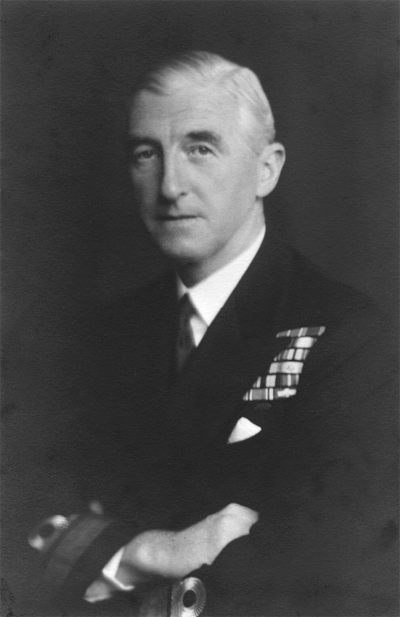
The convoy system formed the Atlantic Bridge between North America and Great Britain. It was principally operated from the Port of Liverpool and the headquarters of the Commander-in-Chief Western Approaches, Admiral Sir Max Kennedy Horton RN, was in Derby House.

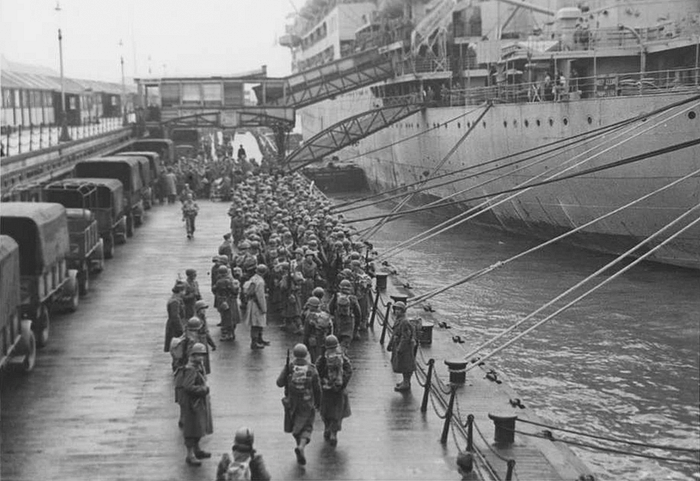
In addition to convoys, fast ocean liners were requisitioned as troop ships to carry American soldiers to Britain. The two Cunard Queens; RMS Queen Mary, and RMS Queen Elizabeth were requisitioned and their extraordinary speed meant that these ships travelled alone, without convoy protection. In truth, the warships often struggled to match their pace, as these huge liners had been built to compete for the fastest crossing — the Blue Riband.

Headquarters Western Approaches coordinated the maritime resources to ensure the convoys were provided with appropriate warship escorts and protection. Liverpool’s Gladstone Dock became the centre of RN activities, and a growing resource steadily improved the security of this trans-Atlantic link. The Port of Liverpool became the hub of North America and the vast dock complex along the Mersey waterfront was strategically perfect for convoy assembly. It was through here that many of the American soldiers sent to fight in the European Theatre of Operations entered Britain as part of the build-up to the invasion.
On the instigation of Winston Churchill, Combined Operations, which was responsible for control of the Western Approaches, was moved in 1941 from Plymouth to Derby House, Liverpool which became known locally as ‘The Citadel’.

Several major Fleet actions occurred as the RN strove to maintain maritime supremacy. The breakout of the Bismarck in May 1941 caused a major disruption to the Trans-Atlantic convoys and the order went out to sink this ship at all costs. It took the combined efforts of the Home Fleet based at Scapa Flow in the Orkneys and Force H from Gibraltar to achieve the desired outcome.
The setbacks, and losses of capital ships and escorts did not cease, but the RN’s growing supremacy on the high seas kept the U-boat menace at bay, a threat which had the potential to starve Britain into submission. Without the steady build-up of forces in Great Britain, the planned invasion of Europe would not have been possible. As the Trans-Atlantic sea lanes were made increasingly secure, the flow of American personnel across the ocean increased and the build-up of the men and material became possible.
With the North Atlantic seaways open, dominating the waters of the English Channel became a priority. The Royal Navy Coastal Forces [RNCF] patrolled vigorously in the English Channel in the lead-up to the invasion to force the German Navy back into its harbours. This dominance allowed the build–up of Allied forces along the south coast of Britain, relatively free of naval attack or reconnaissance.

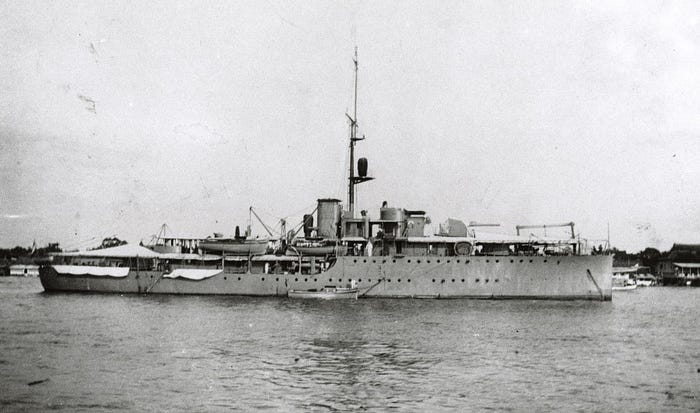
The Royal Navy Patrol Service’s [RNPS] work of keeping British coastal waters clear of the mines, that wreaked havoc on merchant shipping, became important. The clearing of approach routes between Britain and France took on greater importance as the appointed day approached and as part of their efforts to hide the location of the invasion, the RNPS cleared routes that would never be used.

The invasion fleet, which was drawn from eight different navies, comprised 6,939 vessels: 1,212 warships, ranging from battleships to motor torpedo boats; 4,126 landing ships and assault craft; 736 ancillary ships and support craft; and 864 merchant ships.
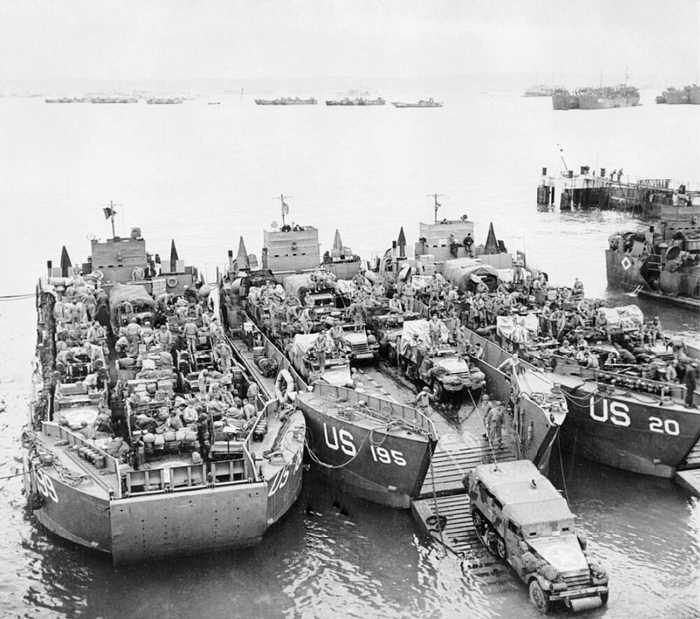
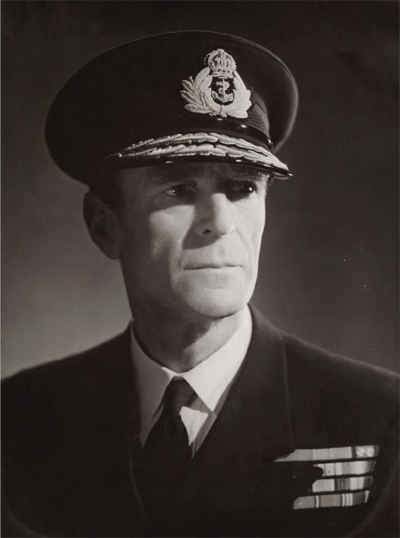
Most of this fleet came from the Royal Navy, which provided 892 warships and 3,261 landing craft. There were 195,700 naval personnel: 112,824 Royal Navy, 25,000 Merchant Navy, 52,889 Americans, and 4,998 from other allied nations. The Naval Commander-in-Chief of the Allied Naval Expeditionary Force was Admiral Sir Bertram Home Ramsay RN.
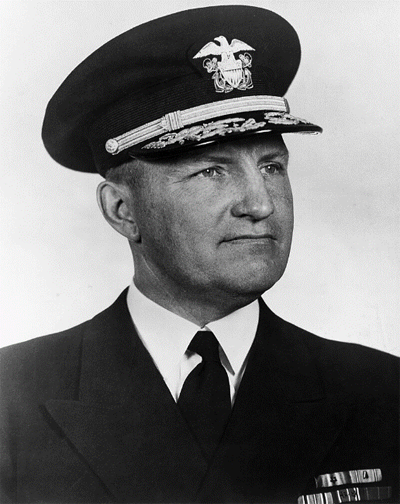
This great armada was split into the Western Naval Task Force [Western Task Force] commanded by Admiral Alan Goodrich Kirk USN aboard the USS AUGUSTA that supported the American sector, and the Eastern Naval Task Force [Eastern Task Force] commanded by Admiral Sir Philip Louis Vian RN in HMS SCYLLA that supported the British sector. The Western Task Force was responsible for the American beaches at UTAH and OMAHA, and the Eastern Task Force was assigned to the British and Canadian beaches of GOLD, JUNO, and SWORD.
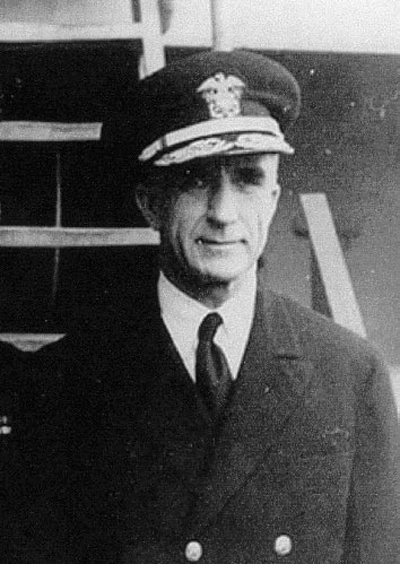
The Western Task Force was split into two assault groups: Assault Group U commanded by Rear Admiral Don P Moon USN in USS BAYFIELD was responsible for the American landings at UTAH Beach, and Assault Group O commanded by Rear Admiral John L Hall Jr USN in USS ANCON that was responsible for the American landings at OMAHA Beach.

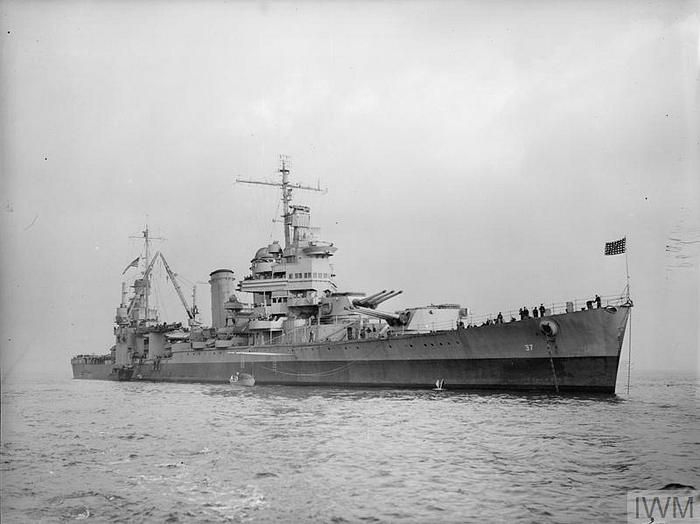
There were two bombardment groups: Bombardment Group A, commanded by Rear Admiral Morton Lyndholm Deyo USN in USS NEVADA, supported the American landings at UTAH Beach, and Bombardment Group C, commanded by Rear Admiral Carleton Fanton Bryant USN in USS TEXAS, supported the American landings at OMAHA Beach.

Bombardment Group A consisted of the 15-inch monitor HMS EREBUS, the 14-inch battleship USS NEVADA, the 8-inch cruiser USS TUSCALOOSA, the 8-inch cruiser USS QUINCY, the 7.5-inch cruiser HMS HAWKINS, the 6-inch cruiser HMS ENTERPRISE, the 5.25-inch cruiser HMS BLACK PRINCE, and the Royal Netherlands Navy 5.9-inch gunboat SOEMBA.
![The 15-inch monitor HMS EREBUS. [IWM FL 693]](https://miro.medium.com/v2/resize:fit:700/1*SsEWEXsQmAJwcPzvS5fAcw.png)
![The 14-inch battleship USS NEVADA. [IWM A 24312]](https://miro.medium.com/v2/resize:fit:700/1*JfWDx453YuXnRpzHPLRMbQ.png)
![The 8-inch cruiser USS QUINCY. [IWM A 7485]](https://miro.medium.com/v2/resize:fit:700/1*GJYFlks4khFYm5aGC46imA.png)
![The 7.5-inch cruiser HMS HAWKINS. [IWM FL 10154]](https://miro.medium.com/v2/resize:fit:700/1*AshgdWHGttoL15_TjCVE8w.png)
![The 6-inch cruiser HMS ENTERPRISE. [IWM FL 5389]](https://miro.medium.com/v2/resize:fit:700/1*U0mKsLS7--4cG-fvWQcJnQ.png)
![The 5.25-inch cruiser HMS BLACK PRINCE. [IWM A 22941]](https://miro.medium.com/v2/resize:fit:700/1*Y82ogcIva9vphhyce6QrWg.jpeg)
Bombardment Group C consisted of the 14-inch battleship USS ARKANSAS, the 14-inch battleship USS TEXAS, the Free French [FF] 6-inch cruiser MONTCALM, the FF 6-inch cruiser GEORGES LEYGUES, the 6-inch cruiser HMS GLASGOW, and the ‘Hunt’-class escort destroyers HMS MELBREAK, HMS TALYBONT and HMS TANATSIDE.
![The 14-inch battleship USS ARKANSAS. [IWM A 21867]](https://miro.medium.com/v2/resize:fit:700/1*sm1JZpzetbjawmpbeo2T1A.png)
![The 14-inch battleship USS TEXAS. [IWM A 8058]](https://miro.medium.com/v2/resize:fit:700/1*CbA-c2A5q7Pl23lKmTWE9g.jpeg)
![The FF 6-inch cruiser MONTCALM. [USN 19-N-48987]](https://miro.medium.com/v2/resize:fit:700/1*JhBMe7EhbSueN3WeCYpEbg.jpeg)
![The Hunt-class escort destroyer HMS MELBREAK. [IWM FL 3416]](https://miro.medium.com/v2/resize:fit:700/1*mK63pfXQJU5Qgq3NB9f8nA.png)
![The Hunt-class escort destroyer HMS TALYBONT. [IWM FL 9888]](https://miro.medium.com/v2/resize:fit:700/1*cwZnFvhZwt_rtSSavv_63A.png)
![The Hunt-class escort destroyer HMS TANATSIDE. [IWM FL 19666]](https://miro.medium.com/v2/resize:fit:700/1*NyAe6MpyMu7Ir8dgYDT7qQ.png)
The Eastern Task Force was split into three assault groups: Assault Group G commanded by Commodore Cyril Eustace Douglas-Pennant RN in HMS BULOLO was responsible for the British landings at GOLD Beach, Assault Group J commanded by Commodore Geoffrey Nigel Oliver RN in HMS HILARY was responsible for the Canadian landings at JUNO Beach, and Assault Group S commanded by Rear Admiral Arthur George Talbot RN in HMS LARGS that was responsible for the British landings at SWORD Beach.
There were three bombardment groups: Bombardment Group K supported the British landings at GOLD Beach and Bombardment Group E supported the Canadian landings at JUNO Beach. Rear Admiral Frederick Dalrymple-Hamilton RN in HMS BELFAST commanded both these Bombardment Groups. Bombardment Group D supported the British landings at SWORD Beach commanded by Rear Admiral Wilfrid Rupert Patterson RN in HMS MAURITIUS.
Bombardment Group K consisted of the 6-inch cruiser HMS AJAX, the 6-inch cruiser HMS EMERALD, the 6-inch cruiser HMS ORION, the 5.25-inch AA cruiser HMS ARGONAUT, the Royal Netherlands Navy 5.9-inch gunboat FLORES, the U-class destroyers HMS GRENVILLE, HMS ULSTER, HMS ULYSSES, HMS UNDAUNTED, HMS UNDINE, HMS URANIA, HMS URCHIN, and HMS URSA, the J-class destroyer HMS JERVIS, the Hunt-class escort destroyers HMS BLANKNEY, HMS CATTISTOCK, HMS COTTESMORE, HMS PYTCHLEY, and HMS HAMBLEDON, and the Polish Hunt-class escort destroyer KRAKOWIAK.
![The 6-inch cruiser HMS AJAX. [IWM A 31122]](https://miro.medium.com/v2/resize:fit:700/1*92MBbnE6xiTUVMeAoINxtA.png)
![The 6-inch cruiser HMS EMERALD. [IWM FL 5381]](https://miro.medium.com/v2/resize:fit:700/1*tFbhPwu1OpvyrkYp7jtkLw.png)
![The 6-inch cruiser HMS ORION. [IWM FL 4708]](https://miro.medium.com/v2/resize:fit:700/1*ucD1W78xjTB5ikeLbDuvDA.png)
![The 5.25-inch AA cruiser HMS ARGONAUT. [IWM A 14299]](https://miro.medium.com/v2/resize:fit:700/1*XQ3AH4WZc44vxapbaHe4zg.png)
![The Royal Netherlands Navy 5.9-inch gunboat FLORES. [State Library of Victoria]](https://miro.medium.com/v2/resize:fit:700/1*EWX_I1EJz2uHSuVadBeXeA.png)
![The U-class destroyer HMS GRENVILLE. [IWM FL 3249]](https://miro.medium.com/v2/resize:fit:700/1*Fw5kYuJgWjm-tds-896iPA.png)
![The U-class destroyer HMS ULSTER. [IWM FL 3875]](https://miro.medium.com/v2/resize:fit:700/1*___OXBIQ1LMJIdfgwrm9fw.png)
![The U-class destroyer HMS ULYSSES. [IWM FL 9289]](https://miro.medium.com/v2/resize:fit:700/1*KPgeTCda-HS-hfBex9h82w.png)
The U-class destroyer HMS UNDAUNTED. [IWM FL 8812]
The U-class destroyer HMS UNDINE. [IWM A 30686]
The U-class destroyer HMS URANIA. [IWM FL 9289]
The U-class destroyer HMS URCHIN. [IWM A 19465]
The U-class destroyer HMS URSA. [IWM A 30698]
The J-class destroyer HMS JERVIS. [IWM A 29614]
The Hunt-class escort destroyer HMS BLANKNEY. [IWM A 8575]
The Hunt-class escort destroyer HMS CATTISTOCK. [IWM A 20088]
The Hunt-class escort destroyer HMS COTTESMORE. [IWM A 23892]
The Hunt-class escort destroyer HMS PYTCHLEY. [IWM A 6680]
The Hunt-class escort destroyer HMS HAMBLEDON. [IWM FL 22844]
The Polish Hunt-class escort destroyer KRAKOWIAK. [IWM A 23898]
Bombardment Group E consisted of the 6-inch cruiser HMS BELFAST, the 5.25-inch AA cruiser HMS DIADEM, the W-class destroyer HMS KEMPENFELT, the F-class destroyers HMS FAULKNOR and HMS FURY, the V-class destroyers HMS VENUS and HMS VIGILANT, the Tribal-class destroyers HMCS ALGONQUIN and HMCS SIOUX, the Hunt-class escort destroyers HMS BLEASDALE and HMS STEVENSTONE, the Royal Netherlands Navy Hunt-class escort destroyer GLAISDALE, and the FF Hunt-class escort destroyer LA COMBATTANTE.
The 6-inch cruiser HMS BELFAST. [IWM HU 4646]
The 5.25-inch AA cruiser HMS DIADEM. [IWM FL 9948]
The W-class destroyer HMS KEMPENFELT. [IWM FL 14307]
The F-class destroyer HMS FAULKNOR. [IWM A 17865]
The F-class destroyer HMS FURY. [IWM FL 4067]
The V-class destroyer HMS VENUS. [IWM FL 20930]
The V-class destroyer HMS VIGILANT. [IWM A 17865]
The Tribel-class destroyer HMCS ALGONQUIN. [IWM A 21923]
The Tribal-class destroyer HMCS SIOUX. [IWM FL 10056]
The Hunt-class destroyer HMS BLEASDALE. [IWM FL 2362]
The Hunt-class destroyer HMS STEVENSTONE. [IWM A 3169]
The Royal Netherlands Navy Hunt-class escort destroyer GLAISDALE. [IWM FL 9779]
The FF Hunt-class escort destroyer LA COMBATTANTE. [IWM A 13893]
Bombarding Force D consisted of the 15-inch battleship HMS WARSPITE, the 15-inch battleship HMS RAMILLIES, the 15-inch monitor HMS ROBERTS, the 7.5-inch cruiser HMS FROBISHER, the 6-inch cruiser HMS MAURITIUS, the 6-inch cruiser HMS ARETHUSA, the 6-inch cruiser HMS DANAE, the 6-inch Polish cruiser DRAGON, the K-class destroyer HMS KELVIN, the S-class destroyers HMS SAUMAREZ, HMS SCORPION, HMS SCOURGE, HMS SERAPIS, and HMS SWIFT, the Royal Norwegian S-class destroyers STORD and SVENNER, the V-class destroyers HMS VERULAM and HMS VIRAGO, the Hunt-class escort destroyers HMS EGLINTON and HMS MIDDLETON, and the Polish Hunt-class escort destroyer SLAZAK.
The 15-inch battleship HMS WARSPITE. [IWM A 23916]
The 15-inch battleship HMS RAMILLIES. [IWM A 25722]
The 15-inch monitor HMS ROBERTS. [IWM A 17511]
The 7.5-inch cruiser HMS FROBISHER. [IWM A 10353]
The 6-inch cruiser HMS MAURITIUS. [IWM FL 15132]
The 6-inch cruiser HMS ARETHUSA. [IWM FL 889]
The 6-inch cruiser HMS DANAE. [IWM FL 791]
The 6-inch Polish cruiser DRAGON. [IWM A 19214]
The K-class destroyer HMS KELVIN. [IWM FL 3886]
The S-class destroyer HMS SAUMAREZ. [IWM FL 18712]
The S-class destroyer HMS SCORPION. [USN 80-G-253421]
The S-class destroyer HMS SCOURGE. [IWM FL 18828]
The S-class destroyer HMS SERAPIS. [IWM A 30814]
The S-class destroyer HMS SWIFT. [IWM FL 7061]
The Royal Norwegian S-class destroyer STORD. [IWM A 20865]
The Royal Norwegian S-class destroyer SVENNER. [IWM FL 22742]
The V-class destroyer HMS VERULAM. [IWM FL 5479]
The V-class destroyer HMS VIRAGO. [IWM FL 9578]
The Hunt-class escort destroyer HMS EGLINTON. [IWM A 12237]
The Hunt-class escort destroyer HMS MIDDLETON. [IWM FL 22468]
The Polish Hunt-class escort destroyer SLAZAK. [IWM FL 789]
The minesweepers were the first ships to cross the English Channel as part of the invasion force. These cleared the channels for the invasion fleet. By June 1944, thousands of mines had been laid in the English Channel. The British had defensive minefields that protected their harbours and coastal shipping routes. The Germans had laid defensive minefields along the French coast and offensive minefields within British shipping lanes and harbour entrances. These minefields were not just simple contact mines but consisted of moored mines and bottom mines. Bottom mines were a mix of magnetic, acoustic, or pressure mines, and some even had ship counters that allowed a predetermined number of ships, including minesweepers, to pass by before detonating.
Minesweeping the English Channel to make it ‘safe’ for the assault and bombardment ships to approach the coast of France on D-Day was a continuous battle. This usually required multiple sweeps by minesweepers using different types of gear and the planners of Operation NEPTUNE employed a force of over 300 minesweepers to clear 10 lanes between England and the coast of France.
24 hours before the invasion began, the minesweeping force departed from harbours along the southern coast of England to begin their dangerous task. One such group was Mine Squadron 7 tasked with clearing one of the two assault channels and fire support area 1 off UTAH Beach. It consisted of nine USN minesweepers and one RN motor launch.
The plan was for the sweeping group to advance in echelon trailing overlapping minesweeping gear. USS STAFF (AM-114) was the leading minesweeper of the Squadron and would be the very first ship to travel through the last 12 miles of the assault channels with the remaining minesweepers guiding off its left side. For protection, each ship would overlap the previous ship’s sweeping gear by 100 yards allowing them to sweep from safe water. Two minesweepers were dedicated layers of dan buoys, lighted floats that marked the edges of the swept channel. If a mine was located and brought to the surface, the RN Motor Launch ML-116 was brought up to sink it with gunfire.
![D-Day Task Force Routes. [© Ian R Gumm, 2023]](https://miro.medium.com/v2/resize:fit:700/1*-rtxTH30oCWnh0bUde9UmA.png)
At 17:55 on June 5, when Mine Squadron 7 was passing the slow-moving assault convoy heading to UTAH Beach, USS OSPREY (AM-56) struck a mine, immediately exploded, and caught fire. USS CHICKADEE (AM-59) moved to rescue the survivors while the remaining minesweepers pushed on.
The American minesweeper USS OSPREY (AM-56).
At approximately 23:00 hrs Mine Squadron 7 was entering into the fire support area off UTAH Beach, six miles from the Normandy coastline and well within range of the shore batteries.
After sweeping the fire support area, they moved to sweep as much of the UTAH Beach transport anchorages as possible before these filled up with landing craft. Around 03:30 hrs on June 6, Mine Squadron 7, their assault mission complete, watched as the ships of Rear Admiral Deyo’s Bombardment Group A filed into position.
At 01:00 hrs Major Werner Pluskat, a German Artillery Battery Commander, was at his command post in Sainte Honorine, overlooking the Normandy coast just east of Colleville. He scanned the horizon for the next four hours and saw nothing, but as night slowly turned into day, looking through his binoculars again, Walter Pluskat saw the massed Allied invasion fleet. He recalled: “I saw that the horizon was filling with ships of all kinds. I could hardly believe it”. Stunned, he passed the binoculars to a colleague in the concrete command post and said: “Take a look”. “My god, it’s the invasion” his comrade replied, and the command post reported: “Tausende von Schiffen aufgespürt. Sie kommen!” (Thousands of ships detected. They are coming!)
At 05:30 hrs the Bombardment Groups opened fire with a deafening roar. The Americans fired broadsides, all guns at once, while the British preferred to ‘ripple’ their guns, firing one turret at a time and moving from target to target. 19-year-old Robert Vogt, a German soldier stationed near Arromanches, recalled: “What I saw scared the devil out of me, ships as far as the eye could see. An entire fleet. I thought: ‘Oh God, we’re finished! We’re done for now!’” Allan Snowden, in the battleship HMS Rodney, found “the sheer volume of noise, the blast of the guns was incredible — you could feel it through your body even if you were quite a distance from the gun actually doing the firing. You couldn’t help feeling a bit sorry for the guys on the receiving end.”
The circling assault boats commenced their run-in toward the beaches and at 06:30 the landing on UTAH Beach and OMAHA Beach began. The landings in the British sector followed fifty-five minutes later to allow for the effect of the tide.
Look Forward
In Part Six of D-Day, 6 June 1944 — The Greatest Seaborne Invasion The World Has Ever Known, I look at the role of the Allied Air Force in the invasion.
